

Can I Clean The Inside Of A Waterfall Faucet Spout
Does your seat-and-bound bathroom faucet make dissonance when you turn it on and off? The near probable culprit is debris that has become trapped, either in the supply lines or inside the faucet itself. You can clear it with a uncomplicated process called "flushing the lines."
To complete this project, y'all'll need the following items:
- Fabric Towel
- 1/viii-inch Allen wrench
- Bucket or mixing bowl
- White vinegar (optional)
- Extra set of easily
For a Unmarried‐Handle Faucet:
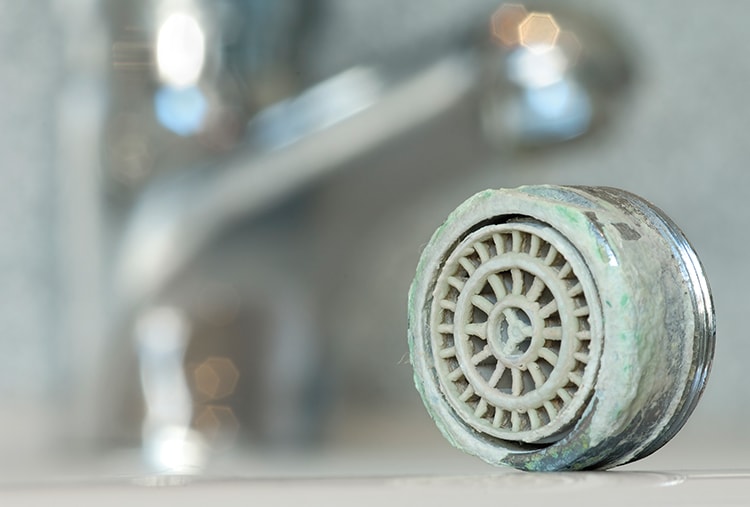
Step one: Check the aerator that's at the stop of the spout. Use the tool that came with the faucet to unscrew the aerator counter-clockwise by hand. But unscrew the aerator at the end of the spout and check information technology for any debris. You tin can scrub it with a toothbrush and a solution of white vinegar and water.
Pace ii: Close off the supply valves under the sink. Turn the faucet handle on to completely bleed the lines. With the aerator removed and the faucet handle in the on position, plow the water supply dorsum on. The sudden burst of water may remove the debris that'south gotten stuck inside. If you still hear the noise, the debris may exist trapped within the faucet itself.
Step three: Turn off the h2o supply and bleed the lines as you lot did earlier. You'll need a couple of tools for this office of the process: an Allen wrench (probably i/8-inch) and a bucket or bowl. Remove the screw cover, and apply the Allen wrench to remove the pocket-sized hex screw belongings the handle in place. Remove the handle.
Stride iv: Turning counter-clockwise, unscrew the dome-shaped cap. With an adjustable wrench, unscrew the nut at the top of the valve. And then, remove the cartridge, being conscientious to notation how it'southward positioned in the valve and so you can reinstall it later. Now you're ready to flush the lines. (see below)
For a Two‐Handle Faucet:
Footstep 1: Remove each of the handles and use an adjustable wrench to unscrew the bonnet nuts. Take off the bonnet, so reach in and grab the stem that the handle was attached to and pull information technology straight up.
Stride two: With the stems removed, insert the Allen wrench into the rubber seat and tilt it dorsum slightly to grab the spring beneath. Elevator out the seats and springs; do the same on the other side.
Flush the Lines:
Once the valves are completely disassembled, place a rolled upward towel in back of the sink and turn a bucket upside downwards over the entire valve assembly. Y'all'll need an extra fix of hands or something heavy to hold the bucket in place. Plough the water supply back on fully. The water will come directly out of the empty valve body and be diverted back into the sink by the saucepan. This should clear any remaining droppings in the lines.
Plough the h2o off and reassemble the faucet, making sure there's no droppings stuck to any of the parts.
Reposition and tighten everything deeply and then plough the water back on. Once you lot've repaired your lines, your faucet should work smoothly and quietly. If you experience difficulty at any point in the process, delight call one-855-345-3358 for assistance, or contact the states online.
Note: This article pertains merely to seat-and-bound faucets, not ceramic valve or DIAMOND Seal Applied science faucets.

Can I Clean The Inside Of A Waterfall Faucet Spout,
Source: https://www.deltafaucet.com/design-innovation/inspiredliving/get-gunk-out-of-faucet-step-by-step
Posted by: adandiffeclus.blogspot.com
0 Response to "Can I Clean The Inside Of A Waterfall Faucet Spout"
Post a Comment